Plum Object Atelier — Practical reuse & low-cost interior craft Under-£15 Material Index
Course Track 03 · Small-Scale Sculpture & Accessories

Ornaments with a Twist

Throughout design history—from the Bloomsbury Group’s hand-painted Omega Workshops ceramics at Charleston Farmhouse to Alexander Calder’s twisted-wire household latches—the liveliest interiors have always featured small, slightly eccentric handmade objects. Because ornaments don’t endure heavy structural loads, you can sculpt them from zero-cost paper pulp, textile offcuts, and hardware-drawer oddities.

Recipe & Moulding 01

Fine-Grain Egg-Carton Pulp Clay

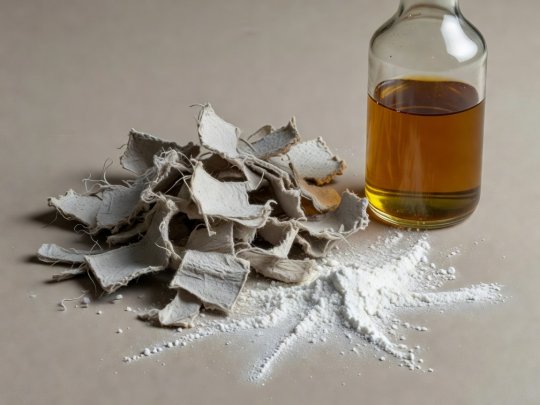
Forget lumpy primary-school newspaper strips. When moulded-fibre egg cartons are soaked in boiling water, shredded, squeezed bone-dry through a tea towel, and kneaded with whiting chalk and linseed oil, they turn into a dense, sandable clay that cures as light and hard as basswood.

Soft-lit 3D render of shredded grey egg carton fibres, white calcium carbonate powder, and a bottle of boiled linseed oil

Exact Atelier Pulp Proportions

  • 120g dry weight torn grey or buff egg-carton fibre (avoid glossy printed lids)
  • 90ml neutral pH PVA adhesive or thick cooked rye-flour paste
  • 75g fine calcium carbonate (whiting) or powdered joint compound
  • 15ml boiled linseed oil (gives plasticity and reduces shrinkage cracking)
  • 5ml clove oil or household borax solution as a natural mould inhibitor

Soft-lit 3D render of a double-handled sculptural mantle ornament moulded from paper pulp clay in matte plum and sand

Press-Moulding & Slow Curing

Wrap an upturned stainless steel mixing bowl and a smaller espresso cup in clingfilm. Press a uniform 7mm layer of pulp clay over both forms. Allow them to air-dry slowly away from direct radiators for 36 hours (rapid heat warps the rim), then pop them off the moulds and join the foot to the bowl with fresh slip.

Assembly Sequence 02

Stacked Hardwood Spool & Curtain-Ring Totems

Turn a bag of mismatched wooden curtain rings, vintage cotton reels, and wooden drawer knobs into striking geometric candleholders or decorative bookends using a single 8mm threaded steel rod or beech dowel.

1

Dry-Stacking for Rhythm and Silhouette

Before gluing, thread your collected wooden components onto an 8mm dowel in alternating wide-and-narrow rhythms—echoing Constantin Brâncuși’s stacked studio columns or Ettore Sottsass’s playful Memphis totems. Place the widest, heaviest hardwood disc at the very bottom for stability.

2

Boring Concentric Centres

If a wooden knob only has a blind screw hole, clamp it firmly in a hand vice and drill straight through the axis with an 8mm Brad-point wood bit. Lightly sand the flat mating faces of each ring on a sheet of 120-grit sandpaper taped to a flat kitchen worktop so the stack stands dead vertical.

3

Fireproof Brass Candle Cup Insert

Never sit a wax candle directly into a bare wooden recess. Cement a flared 22mm solid brass candle socket—or a clean 22mm copper plumbing end-cap—into the top component using two-part epoxy resin so hot wax cannot reach the timber.

Textile & Wire 03

Stiffened Linen & Wire Wall Reliefs

Using drycleaner wire hangers, pliers, and frayed linen tea towels dipped in casting plaster mixed 4:1 with PVA glue, you can build calm, architectural wall reliefs and asymmetric lampshade diffusers for less than £5.

Bend 16-gauge galvanized wire into two interlocking organic loops, binding the crossover joints tightly with fine floristry wire. Cut old linen or unbleached calico on the bias (at a 45-degree angle to the warp threads) so the fabric stretches smoothly around compound curves without puckering. Dip the strips into creamy plaster-PVA slurry, wring out excess drips between two fingers, and wrap the wire armature under gentle tension.

See Wire, Plaster & Binder Costs